Workshop Exercise 3.2 - Adding Virtual Machine Templates
Table of Contents
- Objective
- Step 1 - Investigating Virtual Machines
- Step 2 - Creating a Base Values.yaml File
- Step 3 - Creating Virtual Machine Definition Templates
- Step 4 - Default Values within Templates
Objective
- Understand definitions for virtual machines
- Create a template that can be looped
- Read the data from the PLC
Step 1 - Investigating Virtual Machines
As with everything else in OpenShift, virtual machines can be created and modified by using code instead of the web interface. This allows for managing them through a gitops flow, instead of manual modifications.
For example, this is a snippet of a virtual machine’s definition:
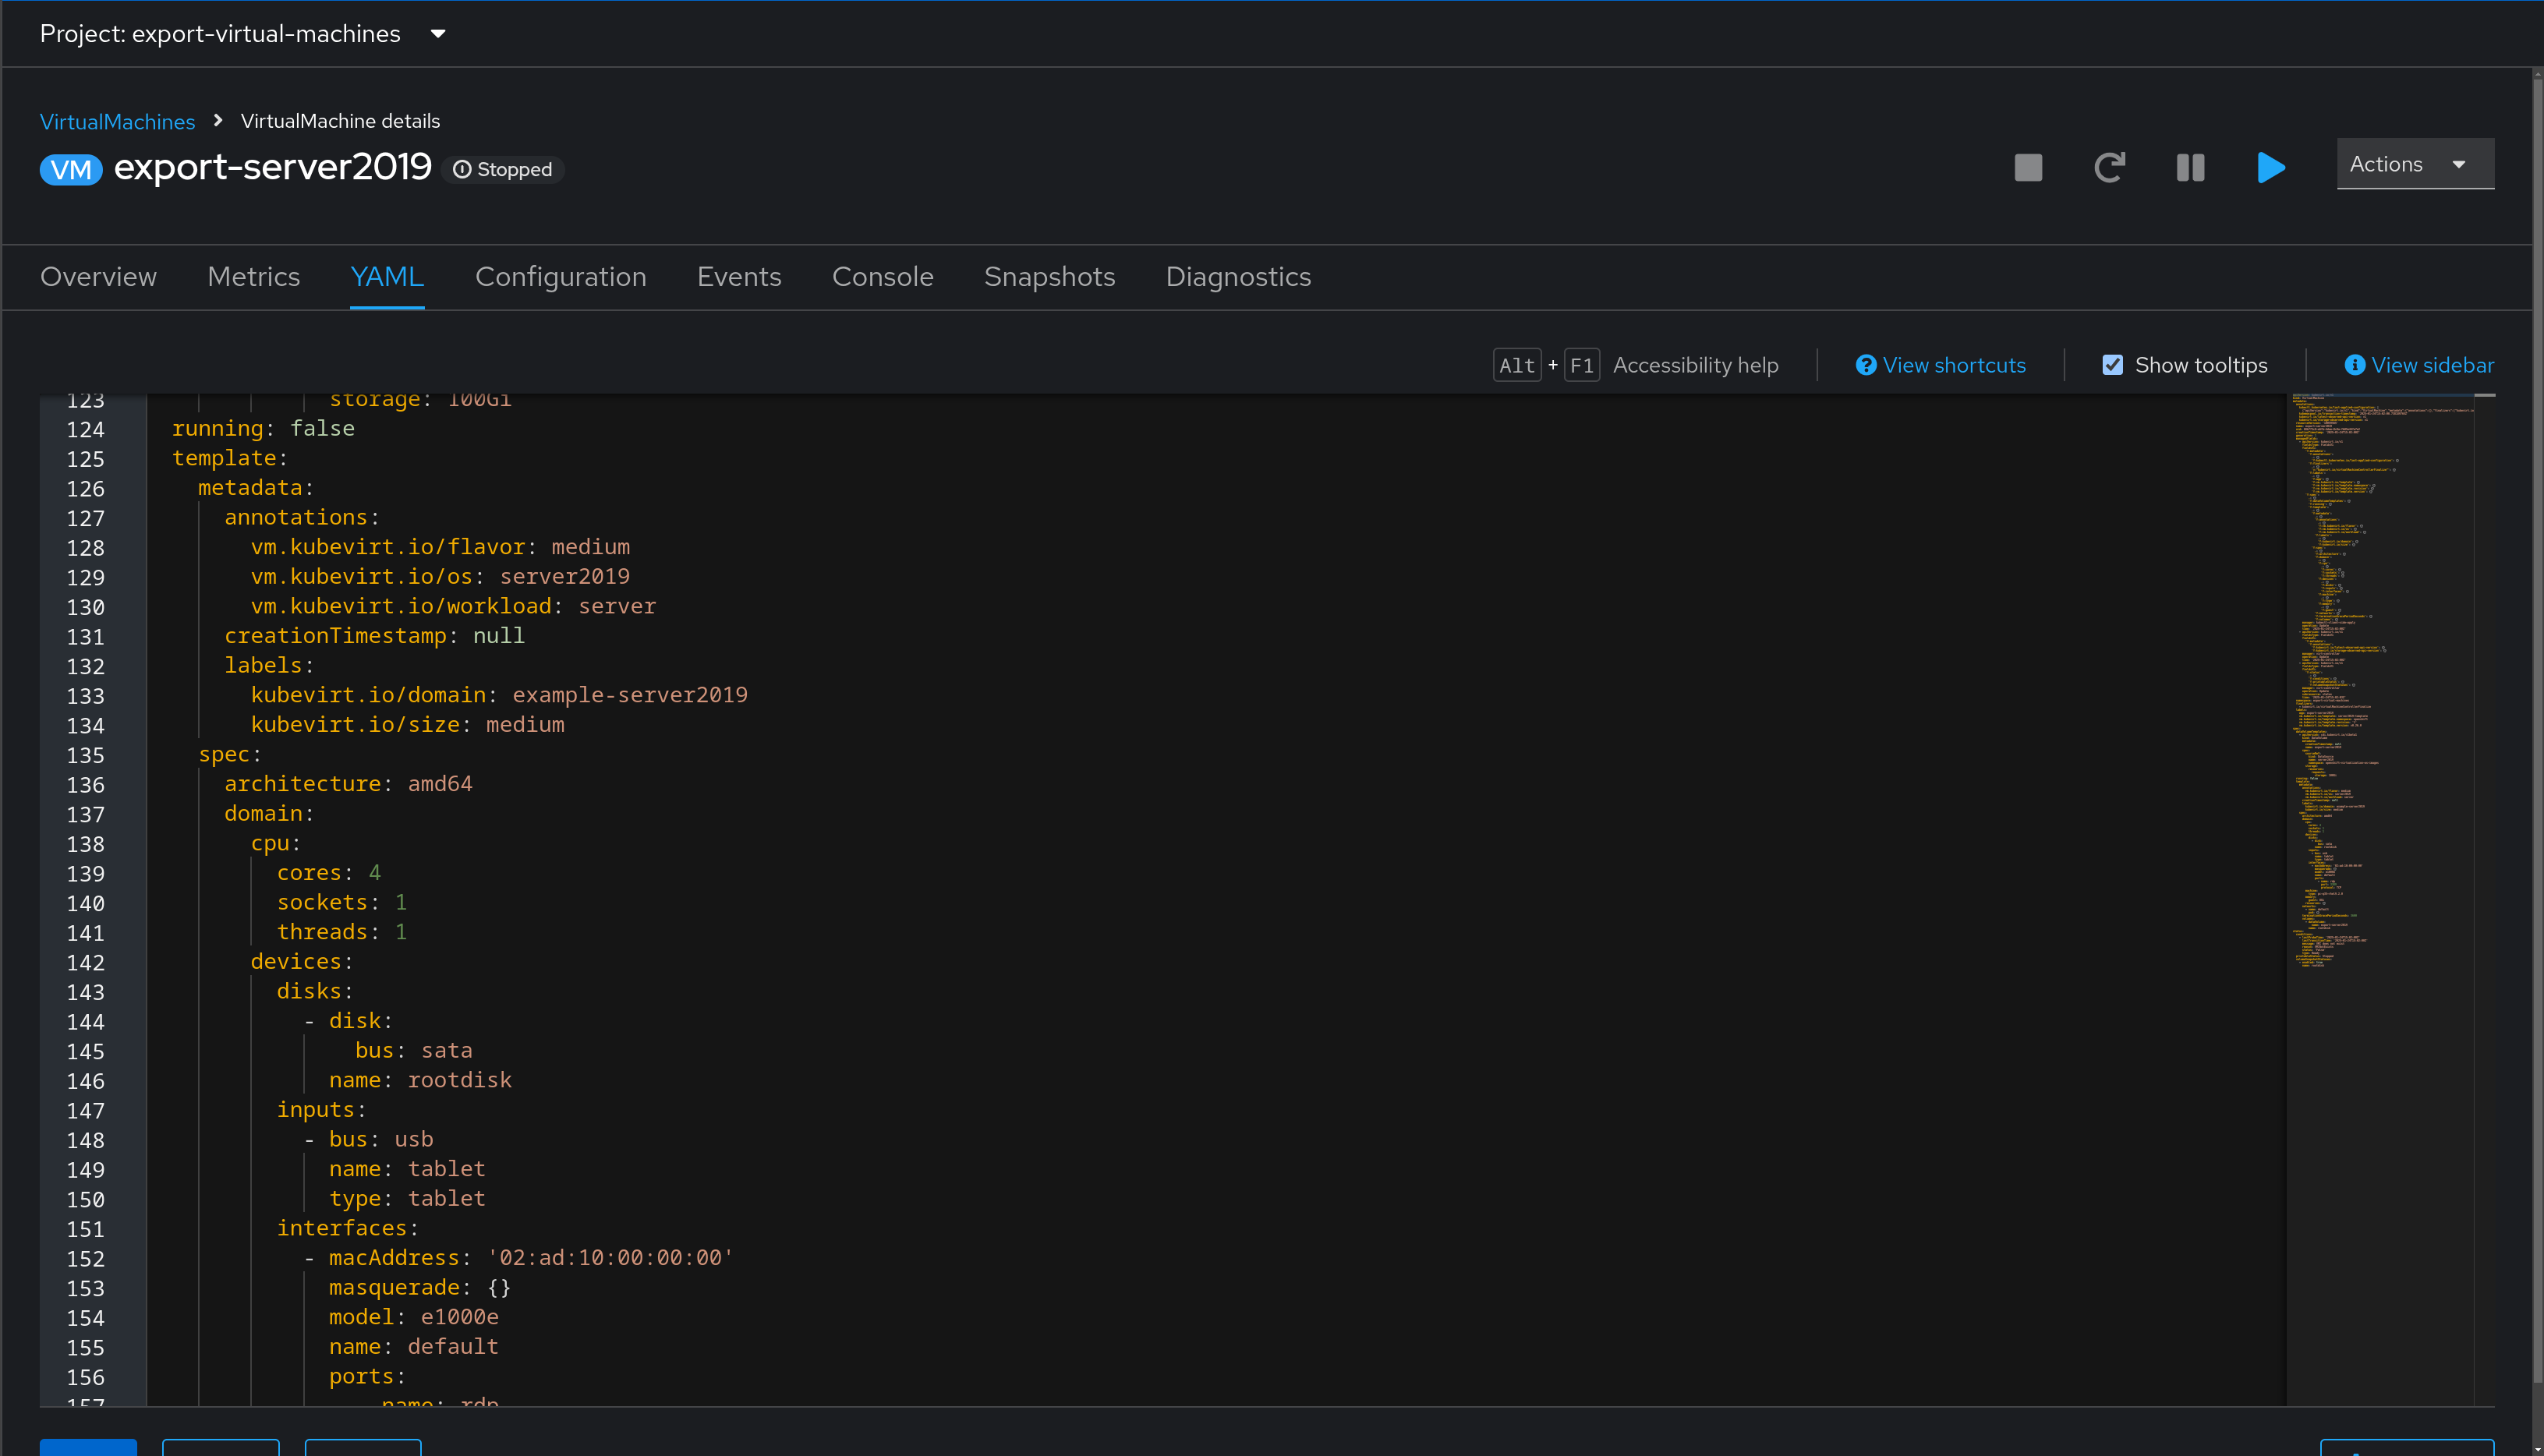
In the screenshot, the virtual machine configuration is shown as code.
An example virtual machine has been created for you, and is located in your team namespace. To begin reviewing it, access the OpenShift web console using the URL and credentials from your student page. Then, navigate to Virtualization > VirtualMachines > example-server2019. Select the YAML tab to view the yaml definition of the virtual machine. This can be used as a base for building other virtual machine definitions.
Step 2 - Updating Virtual Machine Variables in the Values File
Variables that are used by templates can be placed into the values.yaml within the chart directory, which helm will automatically look for and use. These can be overriden if needed, but for our purposes, a simple values file will work.
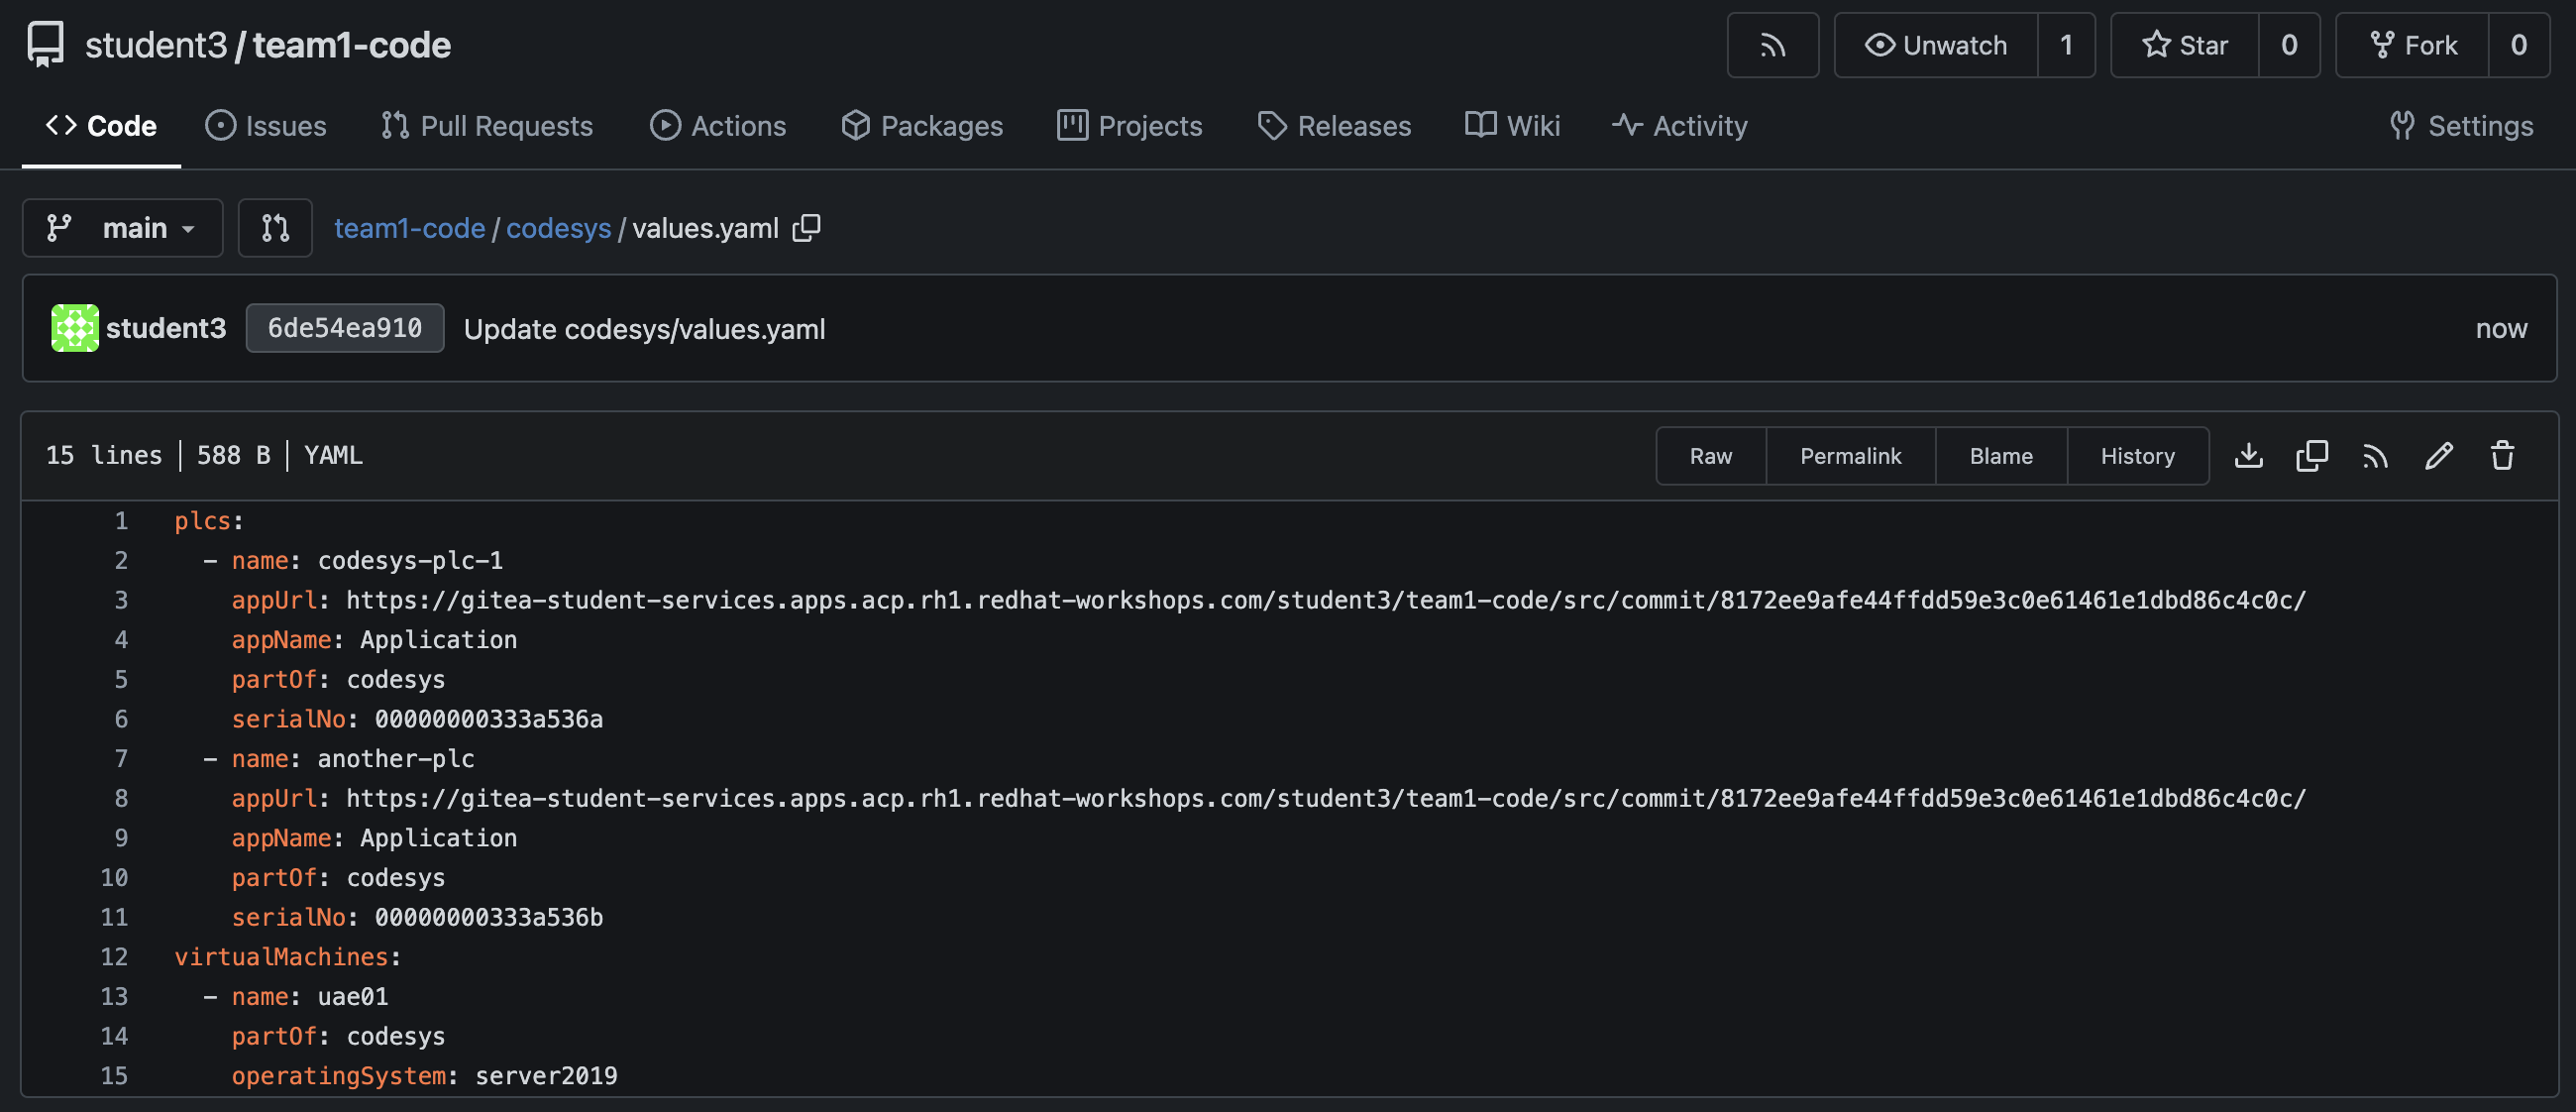
Within the codesys directory in our code repo, add the section values.yaml file:
---
virtualMachines:
  - name: uae01
    partOf: codesys
    operatingSystem: server2019
These values will be used by the template in the next step to create the specified virtual machines.
Once complete, be sure to save the file, or if working within an IDE, commit and push.
Step 3 - Creating Virtual Machine Definition Templates
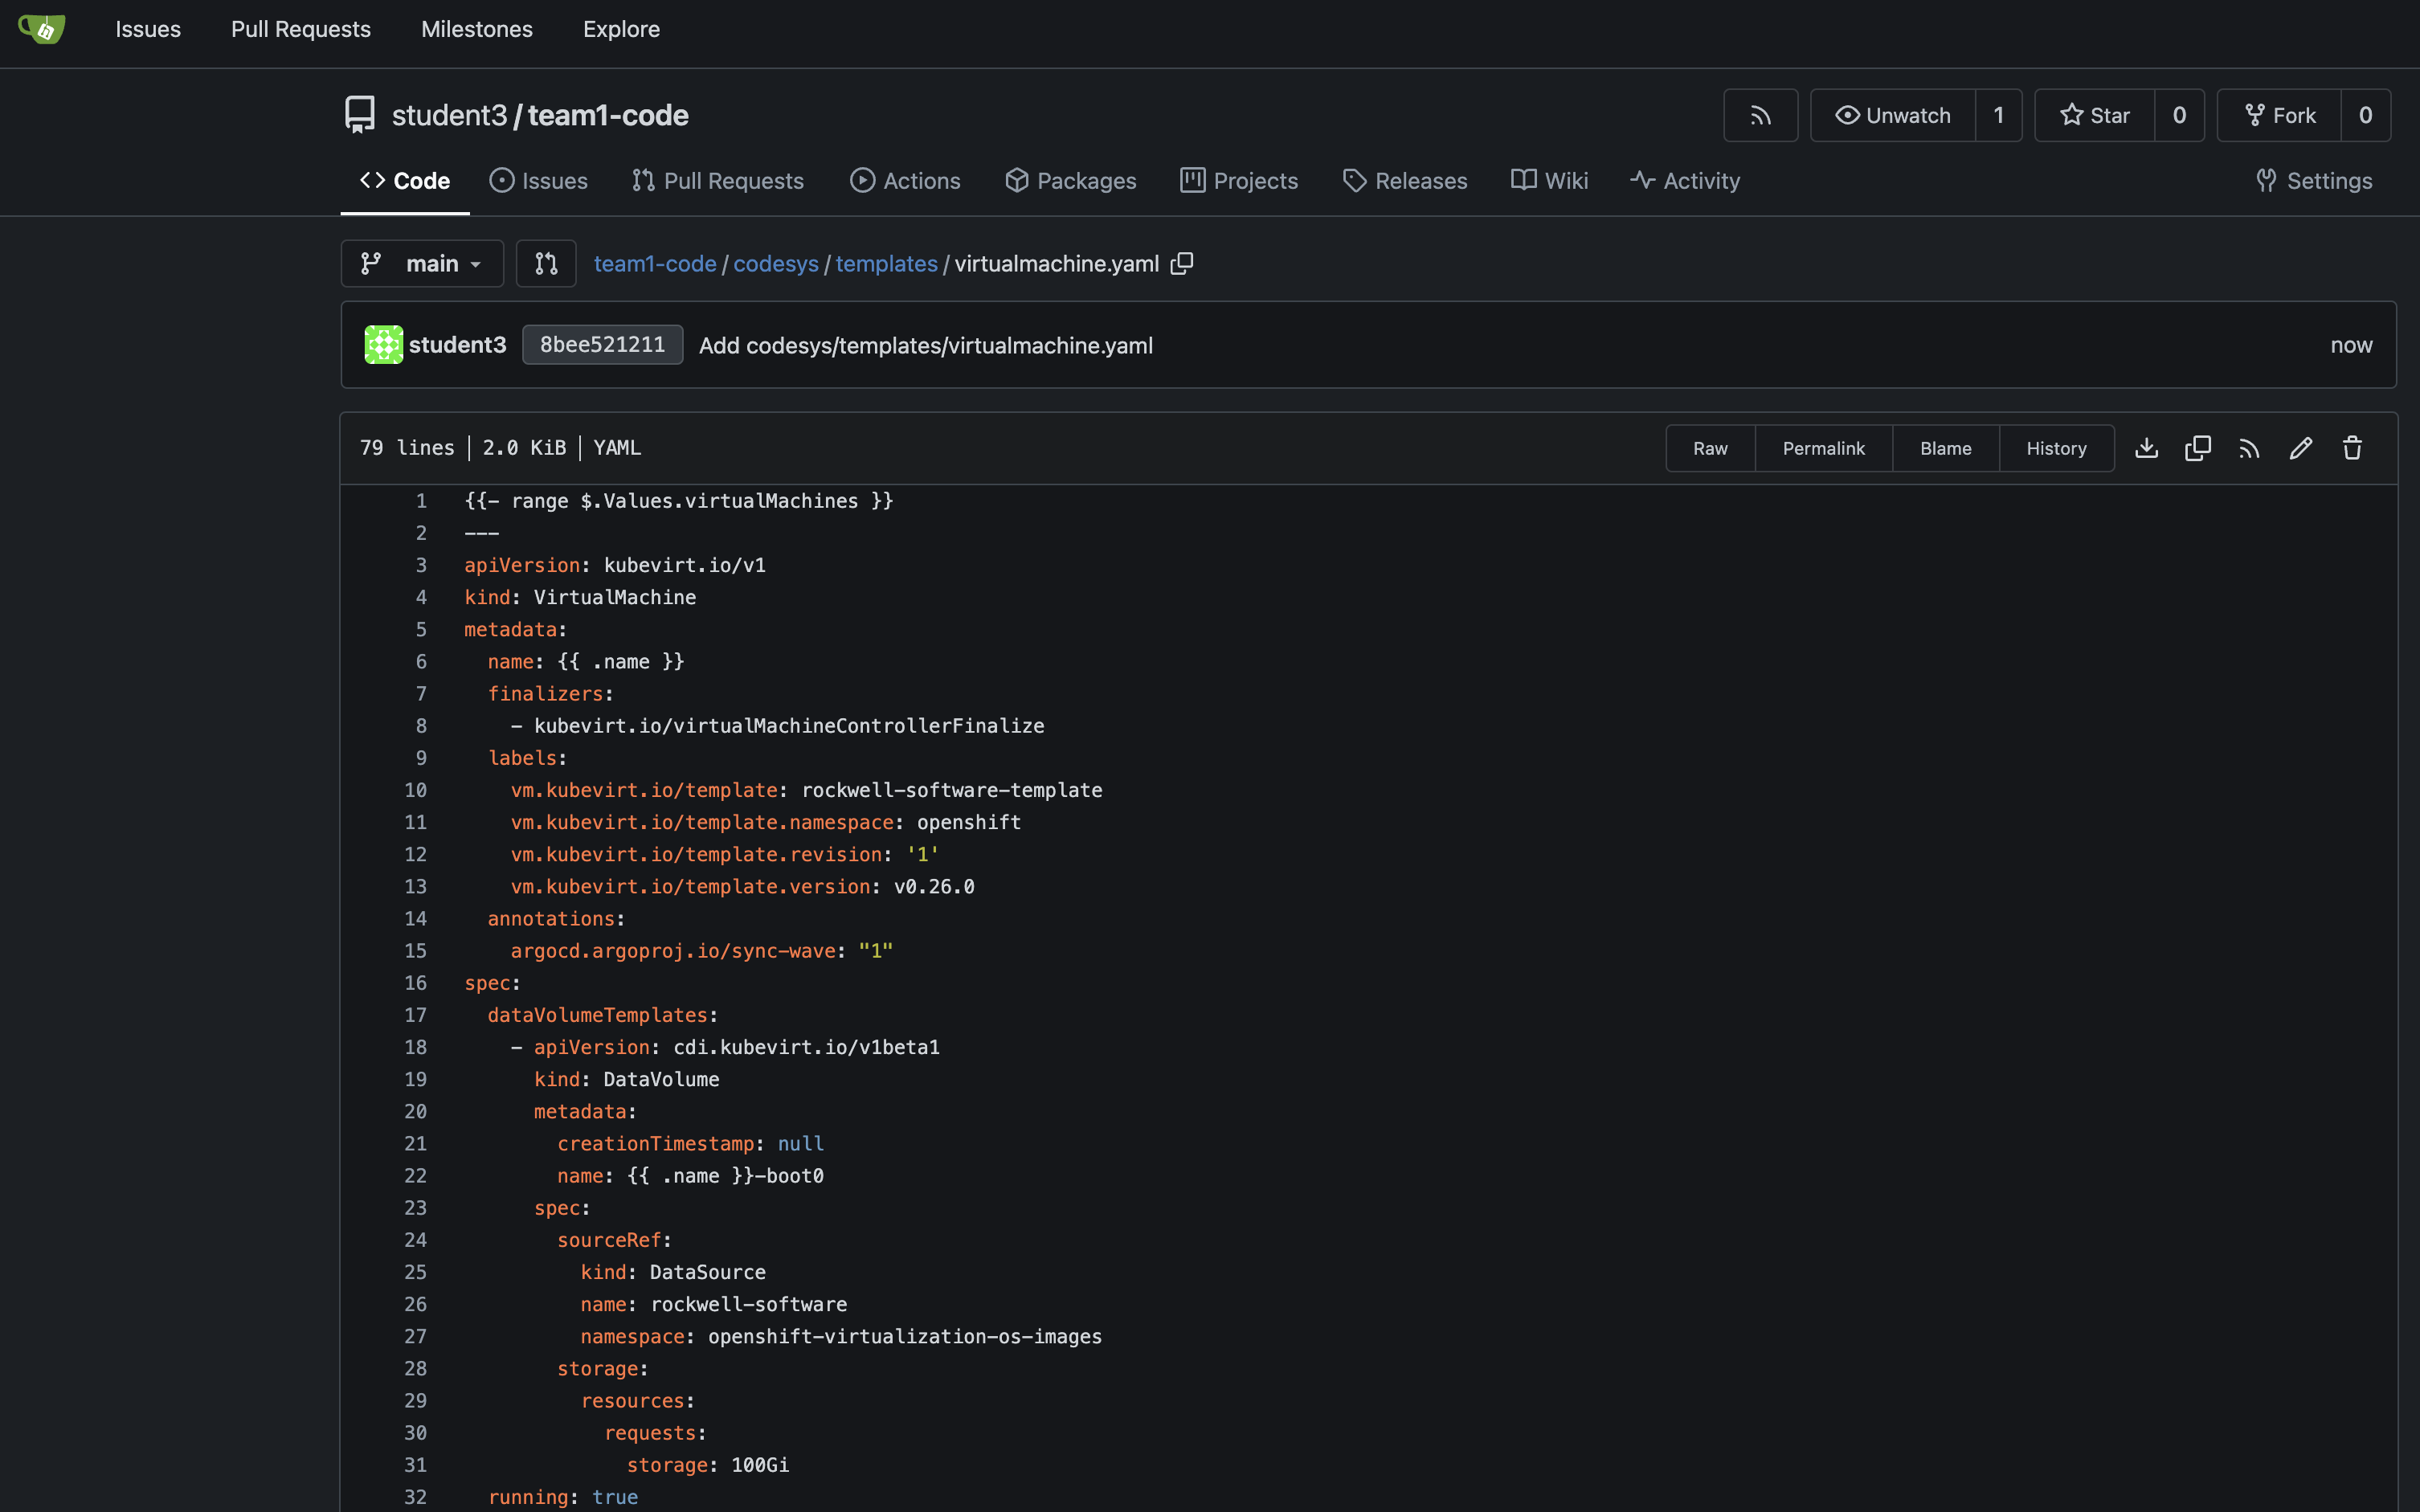
Create a new file within our templates folder called virtualmachines.yaml.
The content will allow us to create multiple virtual machines if needed, but for this usecase, the virtual machine already has the Codesys IDE installed as well, so we only need a single virtual machine.
{{- range $.Values.virtualMachines }}
---
apiVersion: kubevirt.io/v1
kind: VirtualMachine
metadata:
  name: {{ .name }}
  finalizers:
    - kubevirt.io/virtualMachineControllerFinalize
  labels:
    vm.kubevirt.io/template: rockwell-software-template
    vm.kubevirt.io/template.namespace: openshift
    vm.kubevirt.io/template.revision: '1'
    vm.kubevirt.io/template.version: v0.26.0
    app.kubernetes.io/part-of: {{ .partOf }}
  annotations:
    argocd.argoproj.io/sync-wave: "1"
spec:
  dataVolumeTemplates:
    - apiVersion: cdi.kubevirt.io/v1beta1
      kind: DataVolume
      metadata:
        creationTimestamp: null
        name: {{ .name }}-boot0
      spec:
        sourceRef:
          kind: DataSource
          name: rockwell-software
          namespace: openshift-virtualization-os-images
        storage:
          resources:
            requests:
              storage: 100Gi
  running: true
  template:
    metadata:
      annotations:
        vm.kubevirt.io/flavor: medium
        vm.kubevirt.io/os: {{ .operatingSystem }}
        vm.kubevirt.io/workload: server
      labels:
        kubevirt.io/domain: {{ .name }}
        kubevirt.io/size: medium
        app.kubernetes.io/name: {{ .name }}
        app.kubernetes.io/part-of: {{ .partOf }}
    spec:
      architecture: amd64
      domain:
        cpu:
          cores: 1
          sockets: {{ .cpuCores | default "4" }}
          threads: 1
        devices:
          disks:
            - disk:
                bus: sata
              name: rootdisk
          inputs:
            - bus: usb
              name: tablet
              type: tablet
          interfaces:
            - name: default
              masquerade: {}
              model: e1000e
              ports:
                - name: winrm
                  port: 5985
        machine:
          type: pc-q35-rhel9.2.0
        memory:
          guest: {{ .memory | default "8Gi" }}
      networks:
        - name: default
          pod: {}
      terminationGracePeriodSeconds: 3600
      volumes:
        - dataVolume:
            name: {{ .name }}-boot0
          name: rootdisk
{{- end }}
Be sure to save this file once done editing, or if working within an code editor, commit and push.
Once the template is synced, then you can see the VM starting up in the Virtualizaion view

Step 4 - Default Values within Templates
You may have noticed a few lines in the virtual machine template earlier that appear to be referencing values that weren’t defined in our values.yaml file, and had a pipe after them.
sockets: {{ .cpuCores | default "4" }}
guest: {{ .memory | default "8Gi" }}
Another feature within helm templates is the ability to transform inputs, or to assign default values if nothing is specified. Here, defaults of 4 sockets and 8Gi of memory are set as defaults, and since our values.yaml file does not specify these values, the defaults will be applied.
Should we want to override these values, we simply need to define them in our values.yaml file. For example, to have our first virtual machine have more resources and let the second use the defaults, we could modify our values.yaml file accordingly:
---
virtualMachines:
  - name: uae01
    partOf: codesys
    operatingSystem: server2019
    cpuCores: 8
    memory: 16Gi
This is not required for our use case, but feel free to modify your values.yaml file if desired.
Once the VM is fired up, we can head to the next section where we
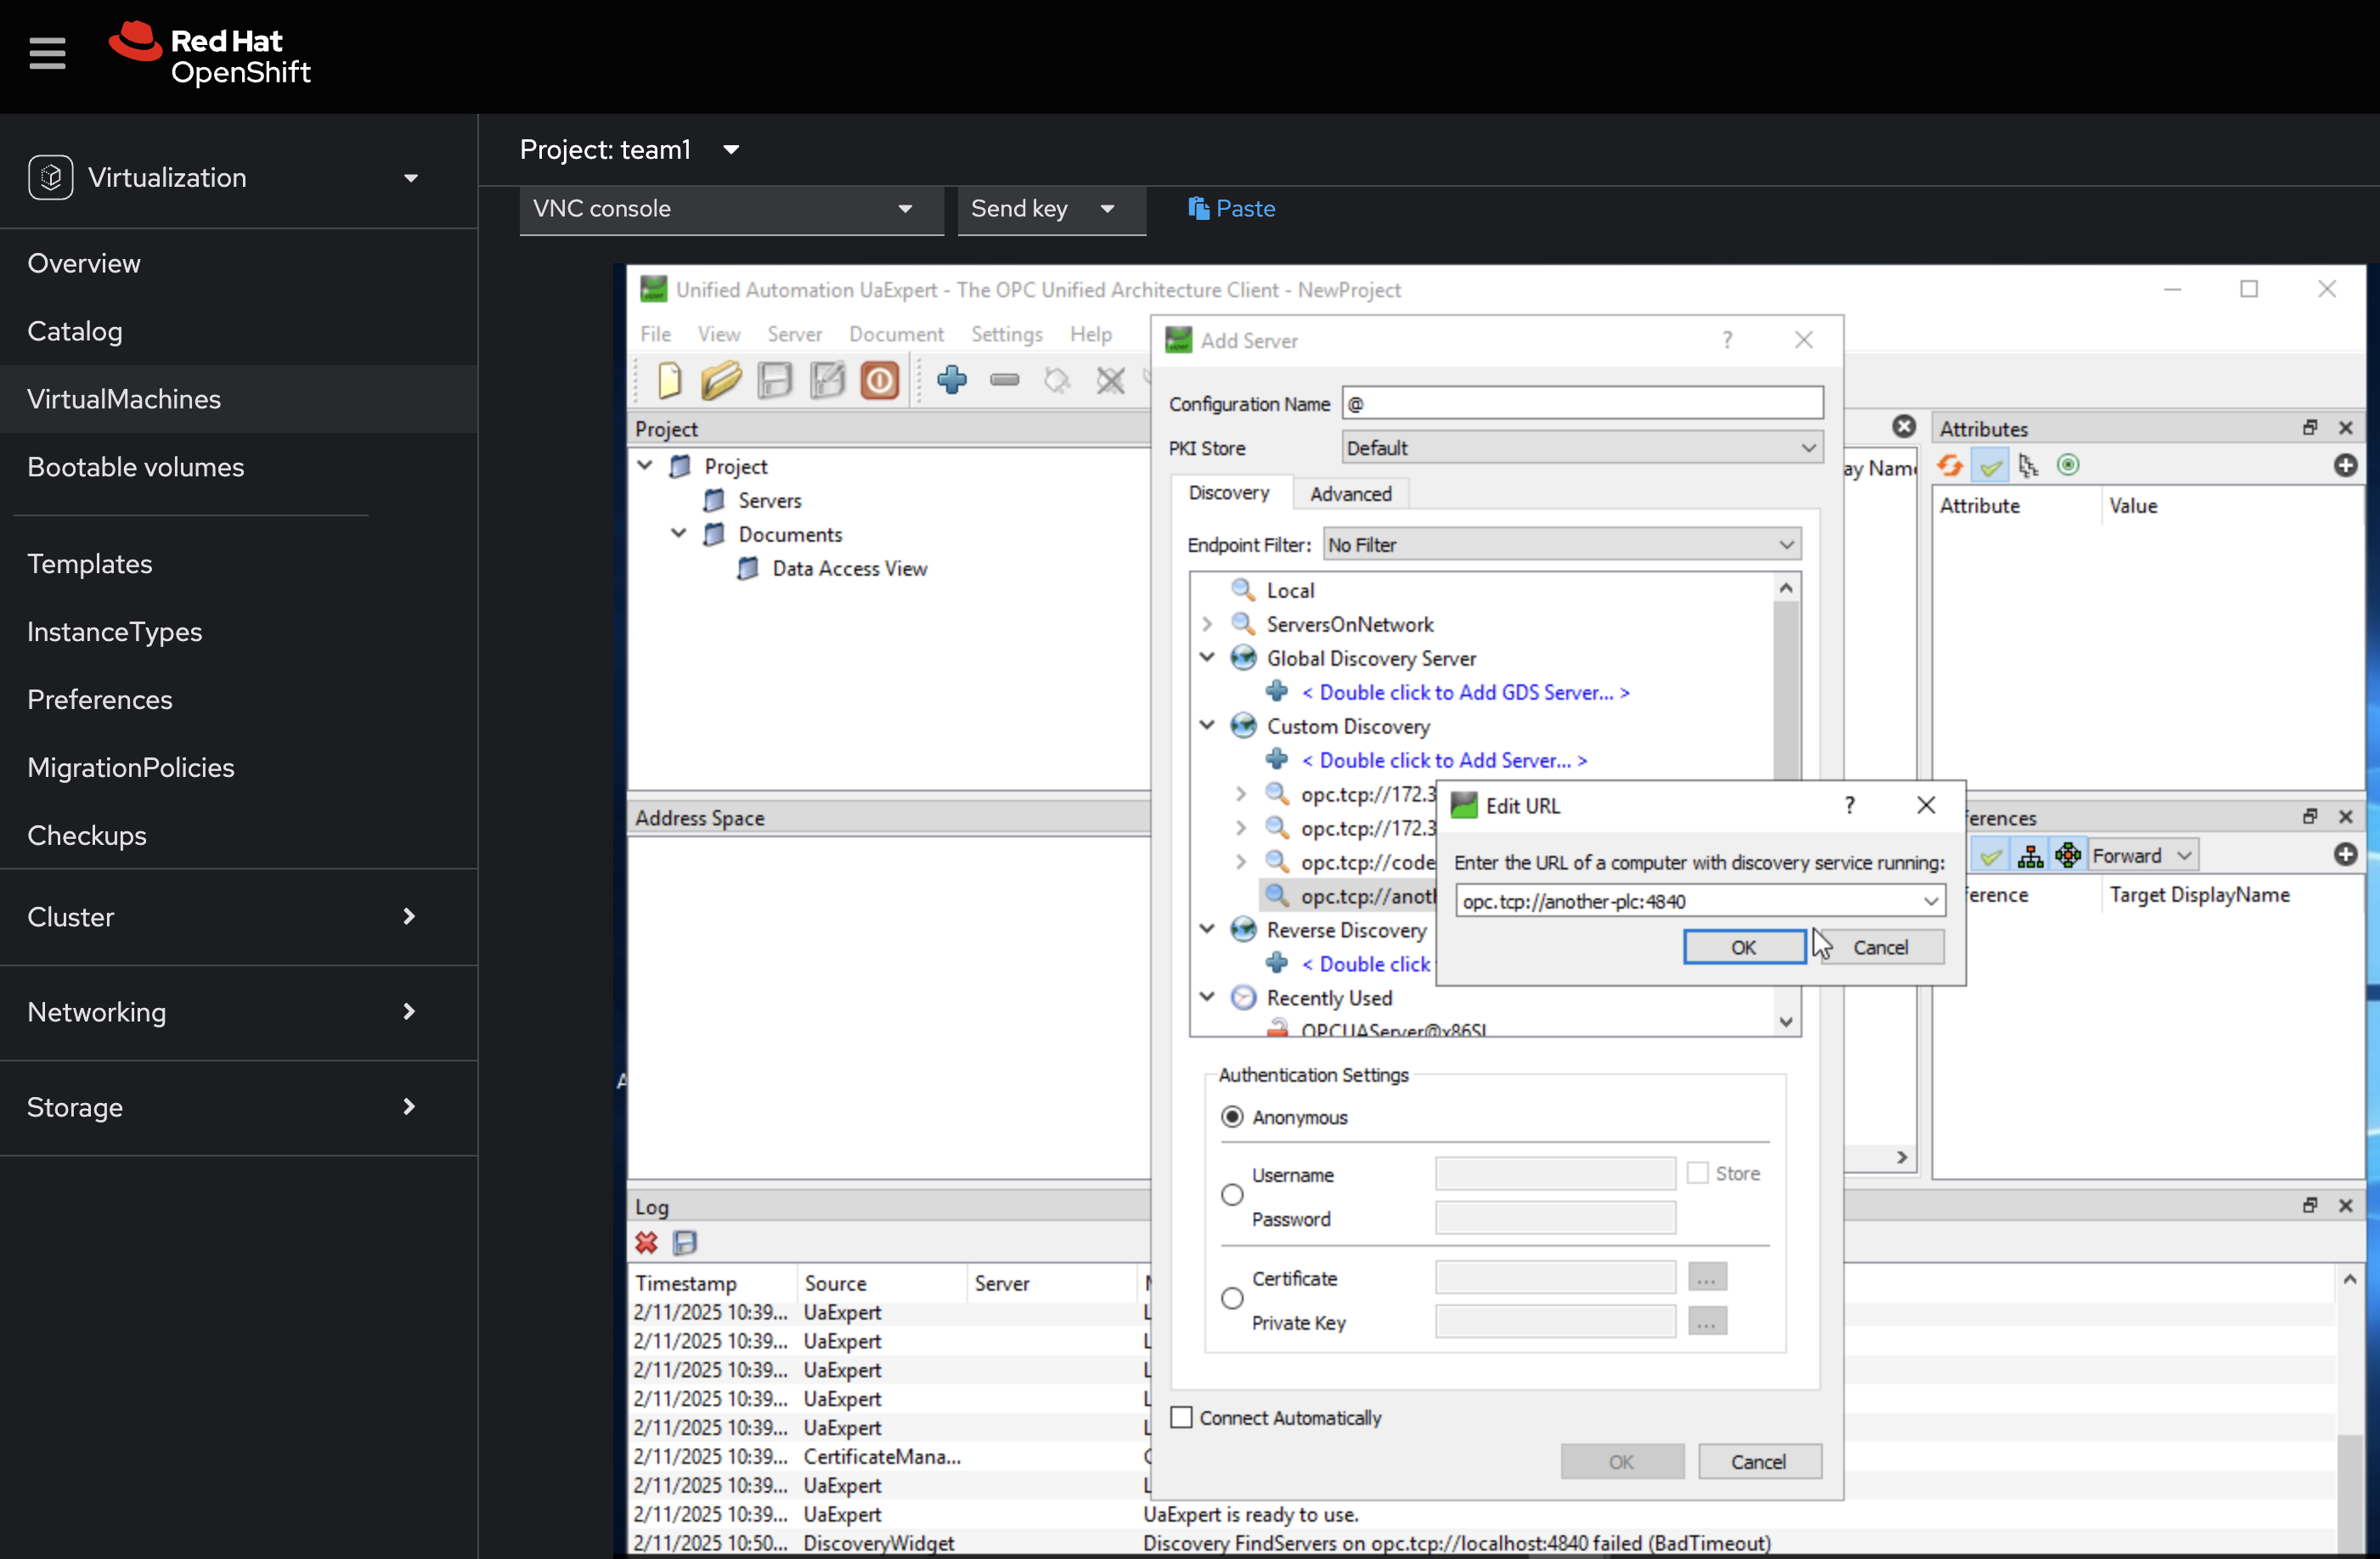
For the connection, use the service details created in Step 3.1, pointing it to opc.tcp://
AU expert should do the rest and you can browse any of the symbols being output.
Navigation
| Previous Exercise | Next Exercise |