Workshop Exercise 2.6 - Creating a Provisioning Workflow
Table of Contents
- Objective
- Step 1 - Adding Credentials to the Existing Job Template
- Step 2 - Creating a Workflow
- Step 3 - Adding Workflow Nodes
- Solutions
Objective
In this exercise, we’re going to build a workflow that will fully deploy our edge devices. We want to perform several steps automatically when the devices boot and call home, so a workflow provides an ideal solution.
The basic idea of a workflow is to link multiple Job Templates together. They may or may not share inventory, playbooks or even permissions. The links can be conditional:
- if job template A succeeds, job template B is automatically executed afterwards
- but in case of failure, job template C will be run.
Workflows are not even limited to executing Job Templates, but can also include project or inventory updates.
This enables new applications for Ansible automation controller: different Job Templates can build upon each other.
Step 1 - Adding Credentials to the Existing Job Template
A job template has been created by the provisioner with an example playbook that tests connectivity to devices. This job template can be found within the Resources > Templates page.
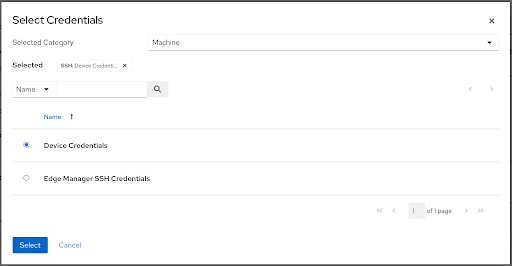
Click on the Test Device Connectivity template, then select Edit at the bottom of the page. Click the mangnifying glass icon next to Credentials. In the Select Credentials box, ensure Selected Category is set to Machine, and then select the Device Credentials created earler in exercise 2.2. This will allow this job template to authenticate to your edge devices as they’re provisioned.
Click Save to apply the changes.
Step 2 - Creating a Workflow
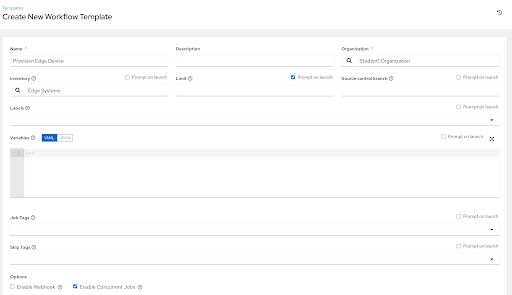
Navigate to the Resources > Templates page. Once here, click Add > Add workflow template. Fill in the form with the following information:
| Parameter | Value |
|---|---|
| Name | Provision Edge Device |
| Organization | (Your_Student_Organization) |
| Inventory | Edge Systems |
| Options |
|
Click Save
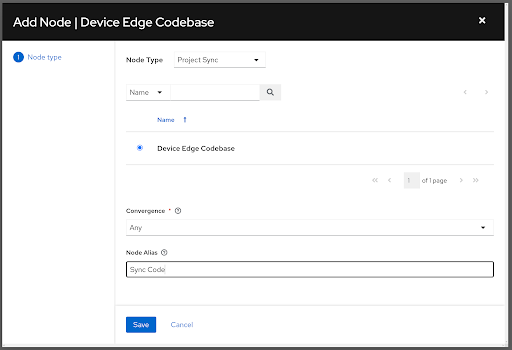
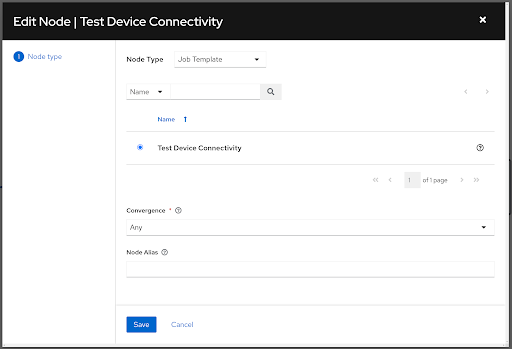
Step 3 - Adding Workflow Nodes
After saving the workflow, you’ll be presented with the workflow visualizer. Click the Start button to begin adding nodes.
We’re going to add three nodes to our workflow to begin with:
- Sync our code repo
- Run the Test Device Connectivity job template
- Run the Initial Device Configuration job template
These nodes should be connected via an On-Success connection in the workflow.
The resulting workflow should appear similar to the depiction illustrated in the Finished Workflow portion of the Solutions section.
Once you’ve added the three nodes to the workflow, click the Save button in the top right corner.
Solutions
Step 1:
Step 2:
Step 3:
Sync Code Node:
Test Device Connectivity Node:
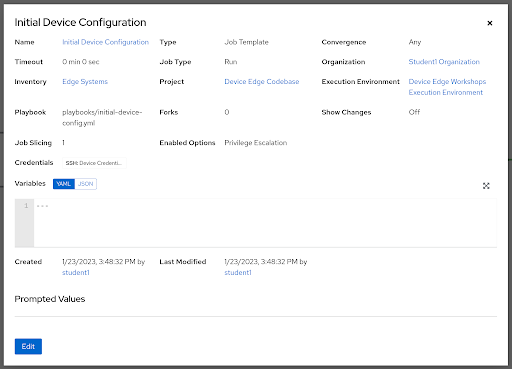
Initial Device Configuration Node:
Finished Workflow:

Navigation
| Previous Exercise | Next Exercise |